Tuesday, January 31, 2012

No-Theme-Tuesday

OK, so with all my themed blogging days I may have been able to sneak it by you that I haven't actually done any quiltmaking of my own lately. I could say it was because I was spending all my free time experimenting with oatmeal, but that's not exactly true. Well, a little true. But not that true.

I've just not been motivated...which led me to the realization today that yes, indeed, despite the unseasonably warm winter we've been having and a slightly higher-than-usual number of days with actual, real live sunshine, I'm still in my usual winter funk. It's not quite as bad this year as it's been in years past, which is why it took me awhile to catch onto it. Still, there it is. It has lumbered into my life and shoved everything else aside for a bit.

I learned long ago not to fight it. If I were to try to force myself to my sewing machine at the moment, likely I'd make a mess of it and get highly irritated to boot, and that's not the quilting Zen I like to achieve. So meanwhile, I'm taking advantage of the time to live out some of my slow quilting tenets--I'm playing with color, I'm petting my fabric, I'm spending time nose-deep in books (quilt design and otherwise), and I'm just riding out the quiet period.

I do actually think these quiet periods are a gestation of sorts. I could get all pastor-y about it and compare it to the ebbs and flows of spiritual experience, but I do believe I have another blog for that sort of thing now. For the purposes of this blog, suffice it to say that one shouldn't be afraid of the quiet periods. I don't worry that I've lost my quilting mojo by any means. I know that it's just gone into a short period of hibernation--a sleepy time necessary to regroup and allow the snoring subconscious to mull over all sorts of wonderful possibilities of color and setting.

My mojo will come back, presumably when it's about 5o degrees out and there's a break in the clouds. Well, since that doesn't happen until sometime in mid-March, hopefully it'll decide to poke its nose out of the cave sometime before that. Whenever. I'll be ready.

(Photo note: don't recall what critter that is sleeping in a cave in Disney's Animal Kingdom; surely not a hibernating kind. But he was the only thing close in my photo files so you'll need to allow me some mammalian metaphor license.)

Monday, January 30, 2012

Slow Quilt Monday--The Wisdom of Winnie the Pooh

"Weeds are flowers, too, once you get to know them."

And more thoughts from A.A. Milne's Winnie the Pooh, my favorite sage, for you to ponder this week:

"Rivers know this: there is no hurry. We shall get there some day."

"Poetry and Hums aren't things which you get, they're things which get you. And all you can do is go where they can find you."

"It's the best way to write poetry, letting things come."

(Where Pooh may be talking about poetry and hums, we can think quilts. And weeds? Well, I'll let you interpret that in your own life.)

Friday, January 27, 2012

Food Friday--Baked Oatmeal

I'm a bit of a late bloomer when it comes to the oatmeal front. I come from a big family and Mom didn't want to be a short order cook, so we were each allowed only one thing we could refuse to eat. Mine was oatmeal. It made me gag when I was little. Then, one day when I was older high school-aged, I was on an all-family church retreat, and Saturday morning the dining hall had oatmeal for breakfast. It was a very crisp fall morning and I'd been up late the night before with my peeps and just felt very in need of a more substantial breakfast than dry cereal. I decided to brave the oatmeal. And something clicked. Yum.

Much more recently I developed a fascination with the concept of baked oatmeal in my slow-cooker. Wouldn't it be wonderful to wake up on a cold winter morning with a hot bowl of oatmeal all ready and waiting, with no effort on my part? That just sounds the epitomy of cozy. So I hit the Internet. Unfortunately, the recipes I found were all for crowds: 6-10 servings or more. I'm the only oatmeal-phile in the house, so I really wanted to scale that down. The biggest issue with oatmeal in a slow-cooker is proportions. I wanted to have nice, creamy oatmeal waiting for me in the morning, not a dried out lump of gruel or, on the flip side, soup.

So I started playing around. I've eaten more oatmeal in the last two weeks than the last two years, now, I think. I couldn't quite get it down to a single serving; it clocks in at 2-3 servings, but it reheats in the microwave quite well, so you'll get a couple of mornings of tasty breakfast with minimal work.

Sandy's Slow-cooker Baked Oatmeal for One, with Leftovers

Equipment needed: 1.5 quart slow-cooker (see notes)

Ingredients:
butter
1/2 cup steel-cut oats
2 1/4 cups cold or lukewarm water

Seasonings (optional, to taste): cinnamon, nutmeg, pumpkin or apple pie seasoning, brown sugar, maple syrup, etc.

Add-ins (optional): dried cranberries, raisins, diced apples, nuts, etc. Dried fruits and nuts hold up to slow-cooking fine; apples will cook down a bit. Bananas or other soft add-ins would do better added in the morning. Don't add dairy products until morning.

Directions:

  1. Coat sides of slow-cooker with butter to keep oatmeal from sticking.
  2. Combine all ingredients in slow-cooker and stir. Cover and set on low, cook for 6-8 hours.
  3. When you're ready to eat, give it a good stir to mix the drier edges with the creamier center. (See below for additional tips.)

Notes:

1. I used a 1.5 quart slow-cooker. If you have a different size, you may need to mess with the proportions of liquid to oats a bit. I don't know that I'd try doing this small amount in significantly larger (3.5-6 qt) slow-cookers--I'd think it would dry out.

2. Steel-cut oats rather than regular rolled oats are highly recommended; they stand up to slow-cooking much better. In fact, I tried steel-cut oats on my stovetop and wasn't a fan, but I love them done in the slow-cooker. There are several brands of steel-cut oats; I use Quaker because they're readily available in my grocery store in the cereal aisle. You can google something like "best steel-cut oats" to find out what other options are popular out there. If you use rolled oats, you're probably going to have to lessen the amount of water. I didn't test those.

3. On seasonings and add-ins, just have fun. I used various combinations of cinnamon, nutmeg, allspice, dried cranberries, apples, and brown sugar. Use a light hand on seasonings the first time; you can always add more later but you can't take it out. (I found a pinch of each worked well for me.) The one issue with this method is you can't really taste-test it until it's all done. See leftover oatmeal recipes below, however; you may choose not to season the oatmeal until you've scooped it into your bowl, leaving your leftovers unseasoned for another use.

4. I found proportions that made my oatmeal creamy but not soupy; you may like yours a little drier or creamier, so you might want to mess with that some too. If it does seem a little dry when you first scoop it out of the slow-cooker into your bowl, some milk or hot water should moisten it up enough. If it seems a little soupy and you have some extra time, leave the cover off the slow-cooker and turn it up to high for another few minutes--that will help dry it out a little bit. I found myself doing that anyway--it makes a little bit of a soft crust on the oatmeal that was quite nice in my bowl.

5. Buttering the sides of the slow-cooker first really does help quite a bit. It's much easier to clean when it's been buttered first. Plus, it does add just a little bit of flavor. I'm not sure I'd go with a spray here--they can leave a residue that's harder to clean.

6. New to slow-cookers? Here's a link to some helpful FAQs. I have several sizes--smaller ones are great for hot dips or cheese/chocolate fondues at parties!

7. Here are some links to recipes you can make with the leftovers. Note that for these recipes, the oatmeal is cooked plain--no add-ins or seasonings--but you could play with the recipes to accommodate whatever you've made.

Leftover Oatmeal Cookies

Leftover Oatmeal Cookies with Butterscotch

Leftover Oatmeal Muffins

If you're looking for a slow-cooker baked oatmeal recipe that will serve a crowd, just google. There's a ton of them out there!

Wednesday, January 25, 2012

Donation Quilt Wednesday--Some Inspiration

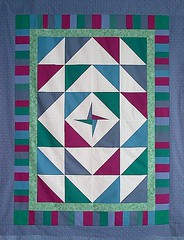
Here's a nice example of a very "fortunate" donation quilt! Cute design, attractive, but still relatively easy to make.

Central Star  (#3617)

And here's another one:
Crazy Quilt Top - Final Border Added

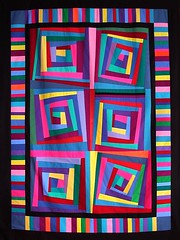
And another:
Lopsided Log Cabin (5387)

These are all by AllThatPatchwork on Flickr. (If this link works, it should take you directly to her charity quilt set.) I had a hard time choosing which I was going to post! I got her permission to use her pics; when she responded she said, "my whole idea in posting them all is to encourage others to do more donation quilts." Here here. What she said.

I've gotten some good ideas from looking at her quilts for future donation quilts of my own. I'm also fascinated by all the many places that receive quilts--we get used to hearing the "big names," (Project Linus, Quilts of Valor, etc.), which are fantastic. But there are so many other places that a lot of you have named: nap mats for inner-city school kindergarten classrooms, birthing kits for Haiti, local shelters, places that have had natural disasters.... Seems everyone needs a quilt to show them a little love, doesn't it? So, what are you sitting around reading this blog for? Go forth and quilt!

Monday, January 23, 2012

Slow Quilt Monday--What If?

It's time to play "What If?"

One of my favorite activities to do when I'm working with small groups is playing "What if?" In my line of work, the "what if" factors tend to be things like, "what if you had more money than you needed," or "what if the building burned down and you had to plan an event somewhere else," or "what if you had 15 more volunteers show up tomorrow?" What if...what if...what if.... Trying to loosen our minds from their usual knee-jerk restrictions: not enough money, not enough people, not enough space, not enough time... or just doing the same ol' same ol' because we're trapped in habits of behavior and attitude.

Quiltmaking isn't all that different from your average not-for-profit small group. Too often we can get stuck in rather comfortable, albeit pretty, ruts. We like certain color schemes that we find ourselves repeating. We are comfortable with certain styles so we keep going back to that well. We get really good at a particular technique so we find ourselves slipping it into as many projects as possible. None of that is bad, of course. We get very nice and enjoyable results from it. But a rut by any other name is still a rut.

And often ruts come from a need for speed. When I'm driving in snow, I find myself choosing those lanes or roads that are already well-traveled because I can go faster driving in other people's ruts. I know it's safe. I won't get stuck. But I'm also not breaking any new ground. And I'm likely to eventually get bored from seeing the same route over and over and over again, as fast and easy as it may be.

What If is actually a big part of slow quilting. It's taking the time to imagine "what if I put these two colors together," or "what if I took this block and flipped this one unit the other way," or "what if I did a quilt in a different shape?" It's taking time with a sketchbook or computer program to just mess around for fun. It's looking at a pattern in a book and imagining it with different colors or different borders or a different setting. It's leaving your blocks on your design wall for just another few days to allow your brain to play with a few more What If scenarios.

It's also, occasionally, "What if I actually did have X skill, or knew Y technique? What could I do?"

In small groups, when we play What If?, we end up with newsprint hung all over walls with multi-colored lists of possible scenarios, arrows pointing this-a-way and that-a-way, lines criss-crossing connecting one idea with another, stars or dots next to some, lines through others. You see, not every What If response will actually work. But some of them do. Some of them lead to new ideas. Some of them inspire entirely new directions. Some of them become catalysts for significant change. If you never play What If, you never find those gems hidden in multicolored lists on newsprint.

This week, I want to play What If? Will you join me?

We can play this in any number of ways--play it however you think you most need to. In future SQM posts, I may come back to playing What If and give a little more direction about particular things to What If about. But for now, I'd rather leave it open-ended for you to think about how it applies to you specifically. The best way to know what kind of What If you need to play is to think about what habits of thought or behavior you've gotten into, or what areas of your quilting life you may tend to focus more on the "don't haves" rather than the "do haves."

For now, just make the What If lists (newsprint and smelly markers optional). Don't worry so much about choosing which ones may actually be worth following. There's plenty of time for that. We're doing this slow, after all, remember?

Don't forget to download Squim the Slow Quilt Movement Snail and put him on your blog!

Friday, January 20, 2012

Food Friday--Buche de Noel

Back in my senior year of French class in high school, I learned how to make a Buche de Noel. For a few years after that, I made the cake for my family at Christmas. Then I did things like get married and have kids and forgot about the recipe still somewhere in Mom's files, and eventually it got lost. But I have reunited with the Buche de Noel finally, and am glad I did.

To the uninitiated: The Yule log is a particularly large log burned in the fireplace as part of the Christmas celebrations in several countries. There is disagreement about its origins, but this isn't "Large Log Friday," so I won't go into that here. Suffice it to say that the Buche de Noel, or Yule Log cake, is meant to represent the wooden log in a much tastier fashion. If you've never had one, think, "big Ho-Ho." It's a thin, flourless chocolate cake rolled up with a cream center. Traditionally, I think, it's chocolate cake with either chocolate or white cream, but in reality the cake and the cream can be any flavor you want.

This past weekend I hosted my side of the family for a belated Christmas celebration, and I decided to return to my high school roots and do a Buche de Noel for dessert. I stuck with chocolate. I made my first attempt on Saturday night at about 7:30 p.m. I have learned that I should not try to bake after sundown on a long day. I made the same mistake twice...did with the egg yolks what I was supposed to be doing with the egg whites and vice versa. Can't come back from that error, really. Next morning, I hied myself to local grocery store to pick up another dozen eggs...this time all went swimmingly.

Forgot to take a picture of the finished product, as things were a bit chaotic when I added the finishing touches to take it to the table after dinner (house-full n' all); but here's the cream that went into the middle!

I sprinkled confectioner's sugar and some mini-M&Ms over the top before serving; next time, I think I'd put the mini-M&Ms on the inside with the cream and do shaved chocolate or some other decoration on top. Lots of folks go all out and frost it to look like bark, add other branches, meringue mushrooms and the like.

The recipe below is inspired by one I found on allrecipes.com. I made some adjustments to the way it was written (to hopefully help others avoid making the same errors I did) and included a couple of extra things. Also, I've made notes at the bottom with additional suggestions.

Buche de Noel

Cream filling:
2 c heavy cream
1/2 c confectioner's sugar
1/2 c unsweetened cocoa powder
1 t vanilla extract

In a large bowl, whip cream, and slowly add confectioner's sugar, cocoa, and vanilla until thick and stiff. Refrigerate.

Cake:
6 eggs, divided into yolks and whites
3/4 c sugar, divided
1/3 c unsweetened cocoa powder
1 1/2 t vanilla extract
1/8 t salt
(confectioner's sugar for rolling and dusting, see below)

1. Preheat oven to 375, and line a 10x15" jelly roll pan with parchment paper. Spray the paper with nonstick spray, and set aside.

2. In large bowl using an electric mixer, beat egg yolks with 1/2 c sugar until thick and pale. Slowly blend in cocoa, vanilla, and salt. Set aside.

3. In a large glass bowl, using clean beaters, whip egg whites to soft peaks. Gradually add 1/4 c sugar and continue beating until whites form stiff peaks.

4. Immediately fold yolk mixture into the whites--do not stir; simply fold gently until two mixtures are combined.

5. Spread the batter evenly into the prepared pan, being sure it reaches the corners and is as evenly spread as possible.

6. Bake for 12-15 minutes, or until cake springs back when lightly touched. Meanwhile, lay a clean, lint-free dishtowel on a flat surface and dust the towel well with confectioner's sugar. (A thorough dusting is important to keep the cake from sticking to the towel.)

7. When cake is done, remove it from the oven, and immediately run a knife around the edge of the pan to help loosen the cake. Turn the warm cake out onto the towel. Carefully remove parchment paper, being sure not to remove a layer of cake with it. Discard paper. Starting at a short edge of the cake, roll the cake up with the towel. (The cake should be touching towel, not cake.) Cool for 30 minutes.

8. Carefully unroll the cake, and spread the filling to within about an inch of the cake edges. You may have more filling than can be expected to fit on the cake--that's fine. You can use it as topping later. (See notes.)

9. Roll the cake up with filling inside, and place seam-side-down onto serving plate. Refrigerate until serving. Dust with confectioner's sugar before serving.

Notes:

  • I used a 10x15 jelly roll pan and thought I probably could've gotten away with a slightly larger one. My cake baked a little thicker and took a little longer to finish baking than the recipe said.
  • Be careful not to overbake the cake--the drier it is, the more likely it is to crack while you're rolling it. Also, don't cool it longer than the 30 minutes. It also helps prevent cracking if it's still a little warm while rolling.
  • The original recipe did not say to spray the parchment paper with nonstick cooking spray--I found that later on message boards. I do wish I'd known to do that--I lost a little of the back of my cake on the parchment paper.
  • I had far more cream than would've fit in the cake--it'd have just splurted out the side as I rolled it. I thought about using it to frost the finished cake but was worried it might be too rich. So, I put the remainder in a pretty serving dish alongside regular "non-dairy whipped topping" and gave people the choice of which they wanted to put on their slice of the buche de noel, if any. Most went for the chocolate cream. I probably could've gotten away with using it as frosting after all.
  • Lots of people frost the cake with a buttercream frosting. I prefer it without, but you may want to experiment with that as well.
Have you ever made a buche de noel in a different flavor? Give us some ideas!

Tuesday, January 17, 2012

In case you're interested...my other blog

 I don't recall now if I've mentioned yet that I've been granted a sabbatical by my organization. From mid-February to early May, 2012, I'll be on sabbatical to gain a greater understanding of issues facing women and girls; partly through study, but mostly through relationship. I'm just letting you know briefly here because how I'm going about it has a whole lot to do with textile arts and quilting. If you're interested in following along, I've started a blog dedicated to my sabbatical time, named "Fabri-Sabbatical." (Get it? Ar ar ar.)

It'll generally have a more serious, thoughtful bent than this one does, and it will be more focused on my experiences than it will be on quilting. But I'll be using my quiltmaking as a way to express what I'm experiencing as well, so there's overlap. I doubt I'll be posting in that one as often--I'm thinking I'll shoot for once a week during the 12 weeks, and maybe just a couple of posts before and/or after. It's not going to become a permanent part of my life--when sabbatical is over, the blog will also end. However, this blog (Quilting...for the Rest of Us) will continue as it has been--no changes here. 

I've decided to do two separate blogs because there are some folks from my organization who are interested in following along with my experiences on sabbatical, but who are probably not particularly interested in the finer points of quiltmaking. Not that my quiltmaking points are particularly fine. Ar ar ar too.

So, if you're interested in also following the other one, you can find it here: http://fabrisabbatical.wordpress.com. There's one post up that explains more about the sabbatical now. 

Otherwise, just stay here! I do plan on getting lots of fabric-play-time in, just for fun, and will still be podcasting n' all, as usual. 

And now, back to our usual programming...

Monday, January 16, 2012

Donation Quilt Wednesday--Two Books for Ideas

Over the weekend I had the chance to stop by my local library again to check out the quilting section; I was in the mood for a special treat, and I was not disappointed! I found a couple of books that are geared at donation or quick gift quilts--they're both great resources if you find yourself running out of ideas or getting tired of doing the same three stand-by designs all the time.

Debbie Mumm's I Care with Quilts: Sewing to Make a Difference, (2009, Debbie Mumm), is not only filled with patterns, but it has information about organizations to which you can donate, ideas for small gifts, and inspirational quotations. It really would make a very good resource. Her designs are classic Debbie Mumm--sort of a modern country. The book is nicely laid out and is pretty simply to look at. Although the designs are all fairly simple, some of them looked like they wouldn't be easily defined as "quick." Several you could probably knock out in a few hours; others seemed like they'd take more time. But still, I did enjoy looking through this book and got a few more ideas planted in my head for future donation quilt projects. 

24-Hour Quilts by Rita Weiss (2006, ), is a little bit more "classic donation quilt project"-friendly, I think, only because most of those projects really are pretty fast and simple. Weiss' premise is that you can make an attractive quilt in under 24 hours--and she's counting that as working time, not 24-hours-in-which-you-also-eat-and-sleep time. As she says, 24 hours doesn't need to be all in one stretch; it could be one hour for 24 days, eight hours for three days, or whatever. And I found it a nice feature that she actually lists the estimated time for each pattern. I don't recall that any of them were listed as 24-hour quilts: The average is probably around eight hours or so--some a little less, some a little more. I saw several designs I liked; found myself double-checking the library due date to see if I felt like I could pull out a couple of quilt tops before I had to return the book. I wasn't as keen on the organization of the book, though. For whatever reason, the publishers decided to put a gallery of all the quilts in the book right at the front, with all the actual patterns in the back. I found myself doing some flipping back and forth. I don't think that would be an issue if you were working on one of the designs because everything you need for the making is right in the pattern itself. But other than that, everything seemed very well laid out and clear--I don't think there would be any problem following the patterns, although, to quote Fats Waller (I think), "One never knows, do one?" I can't judge how well a pattern is written until I actually try to work with it, but it seemed to make sense, anyway.

Do you have favorite books for donation quilts or fast gifts? Let everyone know!


Slow Quilt Monday--Fabric, and a New Friend

 Remember this guy?

Well, Pam of "Hip to Be a Square" turned him into this guy.

Want to put him on your own blog to remind yourself...and tell your bloggie followers...about slow quilting? Just go here to grab him! When you do, post a blog note about the Slow Quilt Movement! If you'd like, you can link to my original post about it as well.

Thanks, Pam! And we shall call him, "Squim." Squim the Slow Quilt Movement Snail. 

And now, onto today's Slow Quilting. 

I've been thinking a lot about fabric lately. Not so much in regards to colors or prints but, rather, in regards to feel. I'm in the process of picking out fabrics for a small project and find myself moving the fabrics I'm auditioning back and forth, back and forth. First I pile them up this way, then I pile them up this other way; then I lay them out side-by-side, then in pairs.... Certainly, some of that is because I'm considering color and value. But if truth be told, it's mostly because I love the way they feel. I can't keep my hands off them.

When I'm auditioning fabrics, they live on my cutting table. I have to walk by my cutting table in order to get to my desk where I work. I walk by that cutting table many times a day. When there's fabric sitting out on it, I find myself reach out, touching, brushing my fingers over it as I walk by. 

When I'm under stress, what am I likely to do? Walk to my shelves of fabric and pet the stacks of half yards and yards. Just run my hands over them. Quilting is very tactile. But sometimes in our concern for color and value and matching points, I think we may occasionally forget about just how wonderful it feels. 

Part of my intensely negative reaction to those donation quilts I was working on was because they just didn't feel pretty. The textures were off. There was uncomfortable roughness, or creepy slipperiness. 

Here's what I think we all ought to do this week: Pull three fabrics at random out of your stash, and sit down with them on your lap. Close your eyes and just feel each of the fabrics. Do they feel different? Could you tell which one was which if someone mixed them up and handed them back to you while your eyes were still closed? Which one would you most love to use in a quilt, simply judging by the way it feels?

Think about your favorite quilts--those you had when you were little, or those you have been given more recently, or those you have made yourself. Close your eyes again and imagine yourself touching that quilt. Do you remember what it feels like? What fabrics do you own today that would evoke that same sense of touch?

Next time you're working on a quilt, just stop for a moment and lay hands on it, as it were. Close your eyes and feel the quilt. With your eyes closed, you can't see where the points don't quite come together, or your quilting line skipped over a couple of threads, or that color you've never been entirely convinced actually works. Nope--you can just feel. What do your hands tell you about your quilt? 


Friday, January 13, 2012

Food Friday--Chicken Noodle Soup

What better for a cold, blustery winter afternoon than a big bowl of chicken noodle soup?

Actually, what's better for just about any afternoon than chicken noodle soup?

Apparently a lot of people think the same thing. Check out wikipedia's exploration of chicken soup around the world.

My version isn't particularly global. In fact, it's quite local--based on my own kitchen and taste preferences. I don't know that I ever followed a recipe when I first started making my own chicken noodle soup--usually I start with a recipe and then jump off from there. This one just sort of came about. My mom used to make soup when I was growing up (although as I kid I liked Campbell's better, dang kid). So even though she never taught me how to make it, maybe something just sank in. In any case, here's my version.

By the way, as my family would tell you, I actually never make any of my own recipes the same way twice. My last Food Friday post mentioned going through your spice cupboard with your nose...that's exactly how I do it. So depending on what smells good to me that day, and depending on what tastes I feel particularly in need of, my seasonings may shift. Read my recipes as "in today's version, I used...." And my amounts are typically guess-work--I put a seasoning in, taste, put in a little more, taste...so read my amounts as "or so." I did do my best to track what I was doing when I made soup this time so it's pretty dang close. But you have permission to play!

Sandy's Chicken Noodle Soup (Today's Version)
4 quarts broth (store bought or homemade, chicken or turkey)
2 celery stalks, sliced thin
4 carrots, peeled and sliced thin
1 onion, diced
cooked chicken, 3-4 cups cubed
1-3 teaspoons kosher salt to taste (start small here--you can always add salt but can't take it back)
1/4 teaspoon white pepper (black pepper is fine, I just don't like the way it looks in soup)
1 teaspoon ground dried thyme
1/8 to 1/4 teaspoon dried garlic powder (or to taste)
1/4 teaspoon ground dried rosemary
(I sometimes add a teaspoon or so of chicken bouillon if I feel the taste needs to be deepened--remember, it's got salt so be careful)
Approx 2 cups dried egg noodles

Saute carrots, celery, and onion together in the bottom of a dutch oven with a little oil, until onion is almost translucent. Add broth, chicken, and seasonings. Heat over med-high heat for a bit to allow flavors to meld--I usually go maybe 10-15 minutes. Taste periodically to see if you need to adjust seasonings. Then bring it to a boil. Add noodles, cook for 8-10 minutes until noodles are done.

You can use rice instead of noodles--rice needs to cook longer, so adjust your times accordingly.

How many servings does this make?....How big is your bowl? :-)

If you make homemade chicken noodle soup, what seasonings do you like to include?

By the way, here are a couple of foodie-quilter blogs you should make sure you check out:
  • Susan, The History Quilter (You can find her blog and her podcast at the same site): http://www.historyquilter.com/
  • My buddy Lori from my guild has a great food blog: http://lipsmackinggoodness.blogspot.com/
  • and she has a quilty blog, The Crafty's Bees Knees: http://craftication.blogspot.com/

Wednesday, January 11, 2012

Donation Quilt Wednesday--Some Strip Tubing Tips

The technique I used for "Fortune," my donation quilt, is strip tubing, which I got from the book of the same name, Strip Tubing, by Daniela Stout and Georgette Dell'Orco, Cozy Quilt Designs. I've seen the technique on the web a lot and have heard of others using it. I do like having this book, though, because it gives you several potential projects using the same method. I'm not going to describe the process in detail as I don't want to infringe copyright anywhere--it simply involves sewing strips together into a tube and then cutting them to get blocks quickly. And it works!

I also bought the ruler just because it does make things go so much more quickly. The Strip Tube Ruler, also Cozy Quilt Designs, can be used not only for the projects in the book but just about any other time you want to quickly cut strip sets into half square triangles. The book gives you suggestions for variations, so really, the number of different projects you can do is multiplied well beyond the five in the book.

I do recommend the book, and/or the technique, and the ruler. I could have very easily gotten two baby quilts out of the blocks I got from the process. I chose to make one larger throw (64"x80"). They do also have directions for using 1 1/2" strips rather than 2 1/2" strips, if that's what you've got in your stash. I probably could have gotten the entire project done in a weekend if I'd not had anything else going on, so it's pretty fast. It's also fairly forgiving since you square up your blocks after you've done the cutting--but it still helps to have a consistent 1/4" seam!

I did discover a few things along the way, though, that I thought I'd share with you.

1. The strips I was using were scrap strips that I'd accumulated from a variety of places, cut by a variety of people, and some handled more than others. That means there was a fair amount of variation in the actual width of the strip. 2 1/2" was a loose definition.

That meant that...


2. When I got my sets of three strip sets sewn together, I measured all of them before I cut the white background strips (which were supposed to be the width of the strip set). My strip sets came out a hair narrower, so I cut my background strips a hair narrower. Taking the time to do that measuring and shifting my cutting accordingly helped tremendously when it came to sewing them into the tube.

However, you can see once in awhile it wasn't quite there. Some strips were really wide. So I used the accurately cut white strips as my seam guide. My 1/4" seam was from the edge of the white, knowing that hangover on the other side ultimately wouldn't matter.
3. It helps to mark the line on the ruler you need to use with tape or something. This is a good idea anytime you're cutting a lot at the same measurement. But for some reason I had particular difficulty making sure I was always on the right line with the triangle. Even with this tape on there, I almost messed up a couple of times. (Can you see it? That pink line is semi-transparent tape.)


4. And, oops, watch the ends.


Like with the width, not all of your strips are the same length, either, so the end of the strip set won't necessarily be neat. I thought I had the whole thing in when I cut the triangle, but didn't.


So from then on, I just lopped off the end of each strip set before starting to cut the triangles. Made it a little bit safer.

5. It took me awhile to get the hang of the angle that you're cutting. You have to cut up one side of the triangle and down the other without moving the ruler, which means you're cutting at an awkward angle at least 50% of the time. And you flip the ruler over--so one block is cut with the ruler point-up, the next one is cut point-down, which also shifts your cutting angle. I finally figured out that if I made the one cut to separate the triangle from the rest of the strip, I could then move the triangle onto my rotating cutting mat to trim up the other side. Made everything much more comfortable.


6. The book tells you, and it's true, that you may need to clip some threads at the point, depending on how your ruler falls compared to the seam. Not a big deal. I did have to be careful not to shred the tip of the triangle but it went quickly.


7. But it all works out in the end, because you square up each block to end up being the same size, no matter what shenanigans may have come before!

Because I was working with such a mishmash of strip sizes to start with, not all of my points exactly match on the finished product, but I decided not to sweat that. There weren't that many points to match anyway in my setting. And, as Frances says, the muggles never notice.


So, if you're looking for (1) a great way to use all those 2 1/2" strips you've got laying around or, (2) a fast project for a gift or donation quilt, this is a great way to go for either one. I'll definitely be doing more of these in the future.

Monday, January 9, 2012

Slow Quilt Monday: Finding Color

Slow Quilt Movement Tenet #1: It takes time to really see.

Where I live, we're in the depths of winter. Haven't had much snow yet, surprisingly, so there's still a fair amount of color out there. But when we're in our normal midst of snow and ice, at a glance the landscape can look pretty monochrome. White, maybe some gray, a little brown....

But there is color if you know where to look. And I don't mean the evergreens.

Slow Quilting is about taking the time to look. So this week, consider trying this: Practicing the idea that it takes time to really see, find a place that at first glance seems colorless. (If you live in the tropics or if you're in the opposite hemisphere from me where it's summer by now, you may need to use a photo for this. For others, you may need to just look out your back window.) Breathe, close your eyes, then open them again and really see. What colors do you see? After you've seen the first things that jump out at you, drop your eyes just a smidge to the left or right. Do you see something different? Notice shadows, notice the underside of branches. Notice what the side of the neighbor's house looks like on the closest side to you, versus several feet further away along the same side.

If you've got the time, use colored pencils to capture the colors you see on paper--don't worry about drawing, necessarily; just create a color story on a page. Scribbles of color are sufficient unto this task.

How is this slow quilting? It's just taking the time to train yourself a little differently, without immediately thinking, "How can I put this into a quilt?" Of course, it may end up in a quilt. I'm not stopping you! But don't think that way to start. Just breathe. And look. And see.

Saturday, January 7, 2012

Donation Quilt Progress--"Fortune"

And so....here's how it all turned out.

As you can see, I ended up choosing "none of the above."

I had originally been leaning towards option 6. But as I kept pondering, I finally decided I really wanted to offset the center diamond, so I dropped it over and down.

My 18-year-old daughter gave it her thumbs up of approval. And she played quilt hanger--I like having her home. My husband fails as a hanger.

The only other thing I'm going to do tonight on it is choose my backing. Tomorrow I'll put it together and hopefully get it quilted. I'm going to do straight-line in the diamonds--so it'll be stich-in-the-ditch through the strips with those lines extending through the white half blocks. It'll emphasize the diamonds while still being pretty fast to do.

By the way, if you were keeping track, majority rule would have been traditional Roman Stripe setting. And I love Roman Stripe quilts. And I'll probably do one at some point. I just wasn't feeling it this time. Loved reading everyone's opinions and rationale, though--thanks for playing along! I enjoyed it!

Second by the way, I've named this quilt "Fortune," since it's the first "fortunate donation quilt" made after my rant. Normally I don't think I'd name donation quilts--you name something, you develop an attachment to it. But this one seemed to need the honor.

Extreme Blog Makeover

Well, not really. I'm just trying to help myself be a more regular blogger in 2012.

I've decided I'm going to try some "theme days" to help spur my ideas for writing, which may help me write more frequently. I'll still have times when I'm on the road or so bowled over with other responsibilities that I miss something, but this should at least help me move it along a bit. Plus, I really want to follow through with a couple of things I've posted about recently, and theme days will help me do that.

So, for at least the next little while:

Slow Quilt Mondays--I'll post here some inspiration or thoughts about a Slow Quilt Movement. If you feel like you need the reminder to slow down, these posts will hopefully help in that regard.

Donation Project Wednesday--Updates on donation projects I've got going, highlighting projects I've found in other places that may be of inspiration, lifting up donation projects of listeners/readers. The emphasis will be on "attractive!"

Food Fridays--see previous blog post on this one.

The rest of the time is an all-out free-for-all, blogwise.

What do you think? 

Friday, January 6, 2012

Food Friday--Stock

I'm working to get healthier (not a New Year's Resolution, rather, a resolution that occurs at almost regular intervals throughout the year), and thought that one way to keep me focused would be through this blog. After all, quilters have to eat! I follow several quilty-foodie blogs and enjoy them, so I'm paying it forward, I guess.

Therefore, for awhile anyway, I'm going to designate Fridays as Food Friday. On Fridays I'll post a recipe or technique or something I've tried. Keep in mind: not an expert! This is just me and my kitchen. So here we go, for what it's worth.

Today I'm talking stock. Years ago, I remember my mother-in-law saying something to me like, "of course, when you make your stock after roasting that chicken..." and I just laughed. Me, make stock? Why, when I can buy it at the grocery store for just a couple of dollars and not have to spend hours in the kitchen? I was a whole lot busier then with little bitties in the house. I still use a lot of bought stock. It is faster, and it's relatively cheap.

But in the last few years I've started making a lot more homemade soups, and finally decided I really should at least try making homemade stock to see whether it made a difference. The first time I tried, it was a miserable failure. The result basically tasted like water that had a drumstick dipped in it for all of five seconds. "Essence of broth," maybe? A couple of years later, I did some googling and tried again. Still tasteless. I know it's not supposed to be much, but really. I could have run tap water and it would've had more flavor.

A few months ago, listener Carolyn from the U.K. sent me a stock recipe that a friend of hers uses--a friend who apparently knows her way around a kitchen! I went from there and then allowed myself to start playing. Thank you so much, Carolyn, and Carolyn's friend--it worked!

I seasoned mine more than you probably normally would a stock, because the way I use stock, I tend to like the same base flavors anyway. It's now more like weak soup than a true broth, but I'm a lot happier with it than my first attempts!


Sandy's Variant on Carolyn's Friend's Turkey Broth
  • 1 honking big turkey carcass (ok, size doesn't matter, but in my case, it was honking big)
  • Enough water to nearly cover the carcass. (Cooks.com says allow a little less than 1 qt of water per pound of turkey, if you want a formula.)
  • 1 carrot, cut into chunks--I used two since my turkey was so big
  • 1 onion, quartered--I used two
  • 1 leek, sliced (Carolyn's friend's recipe had this--I left it out as I didn't have any leeks in the house.)
  • 1 celery stick, halved--I used two
  • salt and pepper to taste--you can skip salt if you need to go low sodium
  • Dried rosemary, thyme, sage, and I probably even tossed in some marjoram. (Tip here: Go through your spice cupboard with your nose--what smells like it belongs in there probably does. You could use fresh herbs tied together so you could pull them out after cooking. Carolyn's friend included parsley. I'm not a fan of parsley so I left that one out.)


Put everything in a large cooking pot and bring to a boil. Skim the surface to remove any scum, then lower the temperature and simmer gently with the lid on for about two hours. Strain the stock, cool, and remove the fat from the surface before using or freezing. (I removed fat twice--once before it went into the freezer, and then again when I was ready to use it.)

You may also have a lot of cooked meat now that you can pull off the bone and chop up for other uses. Messy, but worth it. My meat turned into turkey pot pie the next day...nummy.

Note: I couldn't get the lid on my pot because of aforementioned honking bigness, so I let it go without. This means more water loss, which intensified the flavor a bit, I think. But I still ended up with a lot of broth. I also let it go a little longer than two hours, mostly because I completely forgot about it. It's very forgiving that way. And the smell in your house while all this is going on? Undescribably delicious. My vegetarian daughter was a little creeped out but the rest of us were in heaven.

It's been in the freezer now since Thanksgiving weekend. Today I heated it up and made chicken noodle soup out of it. That'll be next week's recipe.

Do you have a favorite beef, chicken, or vegetable stock recipe? Leave it in a comment!

Monday, January 2, 2012

Donation Quilt Progress--Opinions Welcome!

So, as you may recall after my rant of a couple of posts ago, I've been bound and determined to make a donation quilt that's aesthetically pleasing, doing my best to work exclusively from my stash. I even took it a step further and gave myself a little additional challenge. I've mentioned before my sizeable collection of 2 1/2" strips. I have several jelly rolls, but I also have a few jelly-rolls-worth of just scrap strips, collected through strip exchanges, as giveaways on shop hops, and those I've cut from my own scraps at the end of projects. This was the stash I dug into for this project. (I'll post separately later about the Strip Tubing book and method I used--there's a few tips I'll pass along for anyone else considering the same technique.)

And a further challenge: start with an unfortunate strip. I chose a strip from my stash that I really didn't like, and used that as my jumping off point to choose all the other strips.

You can see right in the center of this layout the teal strip with a small floral print. That was my starting point. I like teal, but this is a particularly murky one with a very odd little floral.

Working off the teal, I pulled blues and greens, and then used the fuschia of the floral to pull me to the opposite side of the color wheel; hence, the pinks/fuschias.

I took a b&w shot just to check my contrast. I wasn't worried about having a ton of contrast in the strips because they were going to be against a white background. (Which, by the way, I did end up having to go out and buy because I didn't have enough true whites in my stash.)

Editor's note: I should apologize for the photography. I was relying on my cell phone which takes decent pics in the great outdoors, not so great in the dimly lit indoors. Plus, I can't stand far enough away from my design wall to get the full design.

Blocks complete. Ignore the setting for now--we'll come back to that in a bit.


Here's the challenge strip in the center row of the strip sets on these four blocks. Not too bad!


The strip tubing pattern I used creates "roman stripe" blocks--each strip set creates between 4-6 blocks, depending on how long the strips are (again, posting on that later so don't sweat it now), with alternation between the first and third strip.
OK--now we're getting into the setting options. I'm going to give you all the pictures here, and you get to tell me your opinion! I think I know which way I'm leaning after looking at all the pics, but would be interested in hearing what you have to say.

N.B.: I'm not going to spend much time quilting this. Most likely, I'll do an all-over meander or something along those lines, as the idea is to still keep it fairly fast and easy as a donation quilt. That's an important point to keep in mind as we look at the setting options: some are the type that scream out for really nice quilting, others can carry an all-over design a lot more easily.

OPTION 1: Matched Up

I'm not sure that this one is really an option for me--but it's a kind of cool effect of the alternating strip sets when you put the four matching blocks together.

For me, this isn't really an option mostly because you'll see one lonely block at the bottom that wouldn't fit with this set...and...
...a whole pile of leftover blocks. Most of my strip sets made 5 blocks, one made 6. Option 1 only uses four blocks per strip set, leaving me with 9 or 10 blocks leftover.

Yes, that means I could get a second quilt out of this but I'm trying to expedite my time on this project at the moment. (Normally, potentially getting two quilts from one set of blocks would be a whoop-de-doo moment, so keep that in mind when planning your own donation quilts--this might be a method for you.)

So here are the real options I'm offering up to you.

OPTION 2: Traditional Roman Stripe set.

Very scrappy, nicely geometric, easy to see done with an overall meander quilt. No one fabric really sticks out this way.

(BTW, note about fabric: there are a couple of blues in these pictures that seem to jump off the page. They're not that stand-out-y in real life. Sorry about that. Lighting and bad cell phone picture issues.)


 And this setting--and all that follow--only leave me with three little orphan blocks, that I can easily use up somehow. Or hand them off to someone in my guild to figure out how to use. In any case, manageable.


OPTION 2: Horizontal Stripe

Funky!


OPTION 3: Vertical Stripe

Still funky!


OPTION 4: I call this one "Echo"

I really like it in theory, but the white space seems to really want feathers or something fancy like that. Not likely to happen. Could, however, do some fast vines with leaves or something. So, not out of the running yet.


OPTION 5: Radiant, Version 1

Nice!

(By the way, I realized after taking this picture that there's one block I'd forgotten to flip. Oops.)


OPTION 6: Radiant, Version 2

Also nice!


So, "what would a quilter do?" If you were making this quilt, which of these options might you lean towards?

I'm not likely to get much sewing time today so I thought that would give y'all some time to give me your thoughts. I've got a couple of front-runner options for myself but it'll be interesting to see if there's a majority of opinion anywhere!

Sunday, January 1, 2012

My 2012 Quilty Resolutions--and Slow Quilting

Courtesy Martina Rathgens, creative commons
I have been pondering this for awhile, and decided this morning I'd write a blog post about launching a "Slow Quilting Movement," with a nod to the Slow Food Movement. Before I sat to write, though, I did a quick Google and came across this blog post, Slow Quilting, stating some of what I'm feeling. So kudos to Andi Reynolds for her words that so closely resonate with my own thoughts, although her emphasis is on hand-piecing, which is not on my radar screen at this point. But still...

One of my resolutions for 2012 is to do a slow quilt. (For those of you who are listeners and are considering entering my 2012 Quilty Resolutions giveaway, this is my personal goal for #2, "The project I've always wanted to do but...."). I've been feeling this nudge for awhile--probably about a year. Here's the backstory; I imagine it's a story that's shared with many of my readers and listeners.

For many years of my quilting life, I've been emphasizing "fast and easy," mostly due to a lack of time. When my kids were little-r, with the job and travel that I have, my quilting life was very much catch-as-catch-can. Finding a few minutes here and there between playing taxi, sitting in doctor's waiting rooms (moms seem to do an inordinate amount of that, don't we?), running multiple pets to the vet...oh, and working full time and periodically hopping on airplanes...meant that my quilting emphasis was on quick gratification. What would I be able to actually accomplish in short periods of time, so I could get something pretty on the wall or to cuddle under? What would give me fast results and that sense of satisfaction of a job well done? (Or, in my case, at least decently-well done.)

Once my kids became less-little-r and largely didn't need me around on a moment-to-moment basis--and had their own wheels and the ability to, as young adults, get themselves to their own dang doctor appointments, thank you very much--I then entered a period that I think of as, "Wheee!!" Suddenly I could spend a whole lot more time in my sewing room and I started cranking out all those quilt projects that had lived in my head for so long. I felt so much accomplishment as I watched the UFOs being finished, as I got a lot more wallhangings on my walls, as I gave away more gifts, as I worked on donation quilts (unfortunate or otherwise). I also started looking for fast ways to use stash--all these pretty pretty fabrics I'd bought but never really had the time to do anything with. Reading other folks talk about their accumulated projects urged me on--Whee! Look how much I could accomplish, too!

Now, though, I'm feeling myself with a strong desire to put on the brakes. I've loved every minute of the frenzy, mind you. There's nothing wrong with the frenzy. But now I want to slow down and focus. I want to engage in a single project that I'll live with from beginning to end. I'll dream it in my head first. I want it to have meaning, symbolism, some connection with the rest of my life. Then I'll spend time planning it out--but not too much planning, because I want to give it space to breathe as well, and become whatever it decides it wants to become as I live with it through time. I want to do a few things, then let it rest, then come back and do a few more things as it speaks to me, then let it rest some more.

I'm not going to say that I want time to "enjoy the process," because I've always enjoyed the process. I just think I'm looking for a slightly different process. And this is different from the UFO that gets set aside as distraction or frustration or other obligations set in. This is something kept in the forefront of my mind and consistently poked away at, but without a specific deadline or even, necessarily, the sense of obligation of, "I must finish this!" More, I'm looking for what will make me feel like it's finished whenever it says it is. I want to give a quilt the space to talk to me.

There were times that I had to rush my little-r kids through bathing and dressing and getting out the door for some appointment or another. And then there were the times that we just hung out, that we could just "be." And in that "be" time, they were still growing, and learning, and becoming. Not to get too metaphorical about it, but that's what I'm looking for in a quilt. I want "be" time.

So my second resolution for 2012 is to work on a Slow Quilt. What do you think? Are you feeling the same urge? Should we launch a Slow Quilt Movement? (Actually, it was launched hundreds of years ago and there are still folks out there that practice it quite intentionally. It's just gotten largely lost on the Internet, I suspect.) I'll be doing fast-n-easy projects and UFOs and such in the middle of that, too--there is still a lot of benefit to that! I just want one project to feel like it's part of my life for a prolonged period of time, in a good way.

For those of you who are curious about what my other two resolutions are, referencing back to the 2012 Quilty Resolutions giveaway:

My first resolution, "Something New I Will Try," is actually two-fold: y-seams and curved piecing. It's a sign of how much I've been immersed in the Fast Quilt movement that I've been quiltmaking for as long as I have and have managed to avoid either of those. I'm not at all worried about either of them, I just need to actually do them. Hexies, I'm coming!

My third resolution, "The One UFO I'm Committed to Finishing," is my warm color challenge wall-hanging. Poor dear has been hanging on my design wall for months, set aside as I got hooked into trying to finish up Christmas gift quilts. Your time will soon come, honey.

So that's it. If you're thinking you might want to be part of a Slow Quilt Movement, let's sometimes hashtag #SQM on Twitter or something. Usually we encourage each other on to an end--but this time, maybe we'll be encouraging each other in the opposite direction: "Woah, there, sister! Sure you want to finish yet?"